
Learning how to crochet is easier than it looks — and with just a hook, some yarn, and a few simple steps, you can create beautiful handmade items even if you’re a complete beginner.
In this guide, you’ll learn how to hold the hook, control the yarn, make your first chain stitch, and create the single crochet stitch — the foundation of countless crochet projects.
By the end of this tutorial, you’ll be able to make a small beginner-friendly washcloth, perfect as a gift or for everyday use.
🧶 Materials You Need
-
Medium-weight yarn (Category 4)
-
5 mm crochet hook
-
Scissors
-
Yarn needle
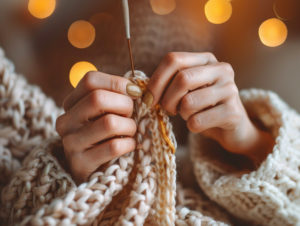
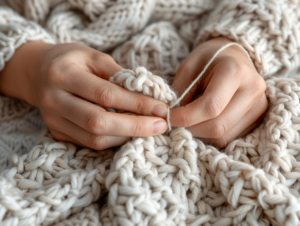
🧵 1. How to Hold the Crochet Hook
Holding the hook correctly is the first step to feeling relaxed and confident with crochet.
There isn’t only one “right” way to hold it — but there are two common grips that most crocheters use:
🔸 Pencil Grip
Like holding a pen or pencil.
-
Hold the hook in your dominant hand.
-
Place your thumb on the flat part of the hook (the thumb rest).
-
Rest your index finger on top, as if you’re about to write.
-
Let the rest of your fingers curl around the handle naturally.
This grip feels light and controlled. Many people with smaller hands prefer it.
🔸 Knife Grip
Like holding a kitchen knife.
-
Hold the hook so the hook head points downwards.
-
Place your thumb on one side of the flat part, and your index finger on the other side.
-
Let your other fingers wrap around the handle, like you would hold a knife when cutting.
This grip is a bit stronger and can feel more stable for some people.
🧶 Tips for Beginners
-
Try both grips and move your wrist gently as you pretend to crochet — which one feels more natural?
-
Your hand should feel relaxed, not tight. If your fingers hurt after a few minutes, loosen your grip.
-
It’s okay if your grip looks a little different. Over time, your hand will “find” its own comfortable way.
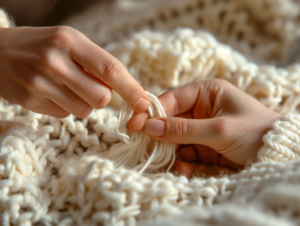
🧵 2. How to Hold the Yarn
Your non-dominant hand (the one not holding the hook) controls the yarn.
Good yarn tension means your stitches are not too tight and not too loose.
Here’s a simple way to hold the yarn:
-
Let the yarn come from the ball and pass it over the back of your pinky finger.
-
Bring it under your ring and middle fingers.
-
Then lay it over the top of your index finger.
Your index finger becomes your “yarn guide”.
You lift or lower it slightly to loosen or tighten the yarn as you crochet.
🧶 Tips for Tension
-
If your stitches are too tight and hard to insert the hook into → relax your fingers and move your index finger closer to your hook.
-
If your stitches are too loose and big → move your index finger a bit higher so the yarn is slightly tighter.
-
Don’t stress about “perfect” tension at the beginning — it will improve as you practice.
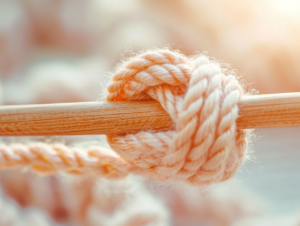
🧵 3. How to Make a Slip Knot
Almost every crochet project starts with a slip knot.
It creates the first loop that goes onto your hook.
Step-by-step:
-
Make a small loop with the yarn, placing the working yarn (the part going to the ball) on top of the tail.
-
With your fingers, reach through the loop from front to back.
-
Grab the working yarn and pull it slightly through the loop to form a new loop.
-
Place that new loop on your hook.
-
Gently pull both ends of the yarn (tail and working yarn) to tighten the knot — not too tight, the loop should move easily on the hook.
If you pull on the working yarn, the loop on your hook should tighten.
If you pull on the loop, the knot should loosen. That’s how you know it’s a slip knot.
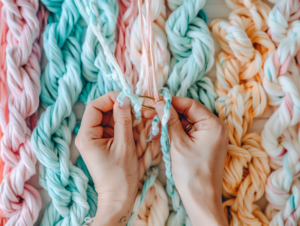
🧵 4. How to Crochet a Chain Stitch (CH)
The chain stitch is the foundation row for many crochet projects.
Step-by-step:
-
Start with your slip knot on the hook.
-
Hold the hook in your dominant hand and the yarn in the other hand.
-
Yarn over (YO): move the hook under the yarn so the yarn sits on top of the hook.
-
Gently pull that yarn through the loop that is already on your hook.
-
You now have a new loop — that’s one chain.
-
Repeat: yarn over, pull through the loop, again and again.
Each “V” shape under your hook is one chain.
Beginner Tips
-
Keep your movements slow and steady.
-
Don’t pull the yarn too tight — the hook should slide through the loops easily.
-
If your chain looks very tight and stiff, loosen your tension or go up a hook size.
🧵 5. How to Make a Single Crochet Stitch (SC)
The single crochet (SC) is one of the most important basic stitches.
You’ll use it in many projects like washcloths, scarves, bags, and more.
Let’s practice single crochet into a foundation chain.
Step-by-step:
-
Make a chain of about 10–15 stitches.
-
Start in the second chain from the hook (skip the first chain).
-
Insert your hook into the middle of the chain “V”.
-
Yarn over and pull up a loop — you now have two loops on your hook.
-
Yarn over again.
-
Pull through both loops on the hook.
-
You’ve made one single crochet.
-
Continue across the row: insert hook into next chain, yarn over, pull up a loop, yarn over, pull through both loops.
At the end of the row:
-
Chain 1 (this is your turning chain).
-
Turn your work.
-
Make single crochet stitches across the row again, this time working into the top “V” of each stitch.
Beginner Tips
-
Try to make your hook move smoothly, not jerky.
-
Don’t worry if your first rows look uneven — that’s completely normal.
-
Focus on repeating the same motion: insert, yarn over, pull up a loop, yarn over, pull through two.
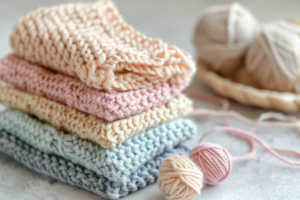
🧶 6. Beginner Project: Easy Crochet Washcloth
Now let’s use your new skills in a simple project.
A washcloth is perfect because:
-
It’s small and quick.
-
It doesn’t need to be “perfect”.
-
You can use it in the kitchen or bathroom, or give it as a gift.
Finished Size (Approx.)
About 18–20 cm (7–8 inches) square, depending on your yarn and tension.
Pattern (US Terms)
-
Chain 26.
-
Row 1:
-
Single crochet in the second chain from the hook.
-
Single crochet in each chain across. (You should have 25 SC.)
-
-
Row 2:
-
Chain 1, turn.
-
Single crochet in each stitch across (25 SC).
-
-
Repeat Row 2 until your piece is almost a square.
You can fold one corner to the opposite side to check if it looks square. -
Fasten off:
-
Cut the yarn, leaving a small tail.
-
Pull the tail through the last loop to secure.
-
-
Use a yarn needle to weave in the yarn ends through the stitches.
🌸 Extra Tips for Absolute Beginners
-
Practice a small swatch before starting the washcloth.
-
Don’t rip out your work too often — it’s okay if it’s not perfect.
-
Keep your sessions short and enjoyable. 10–15 minutes a day is enough to improve fast.